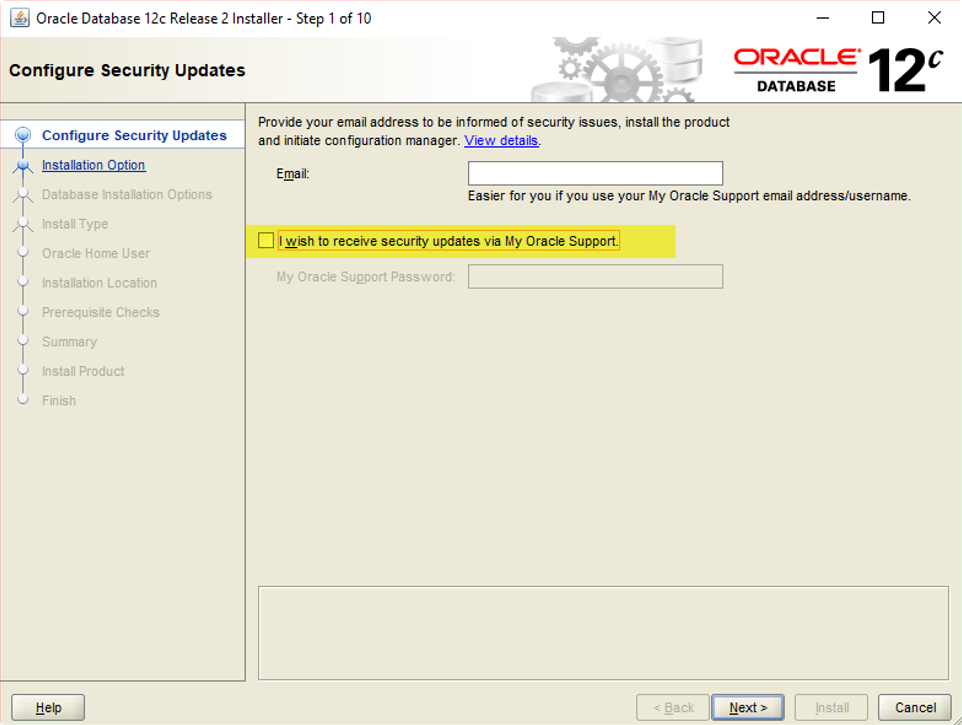
1. Configure Security Update
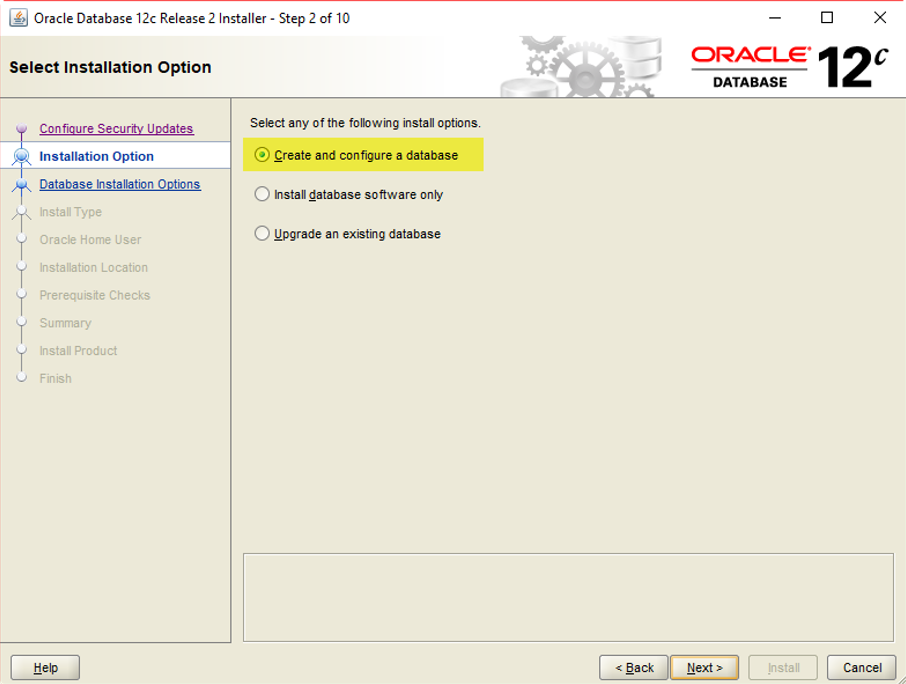
2. Installation Option -> Create and configure and database
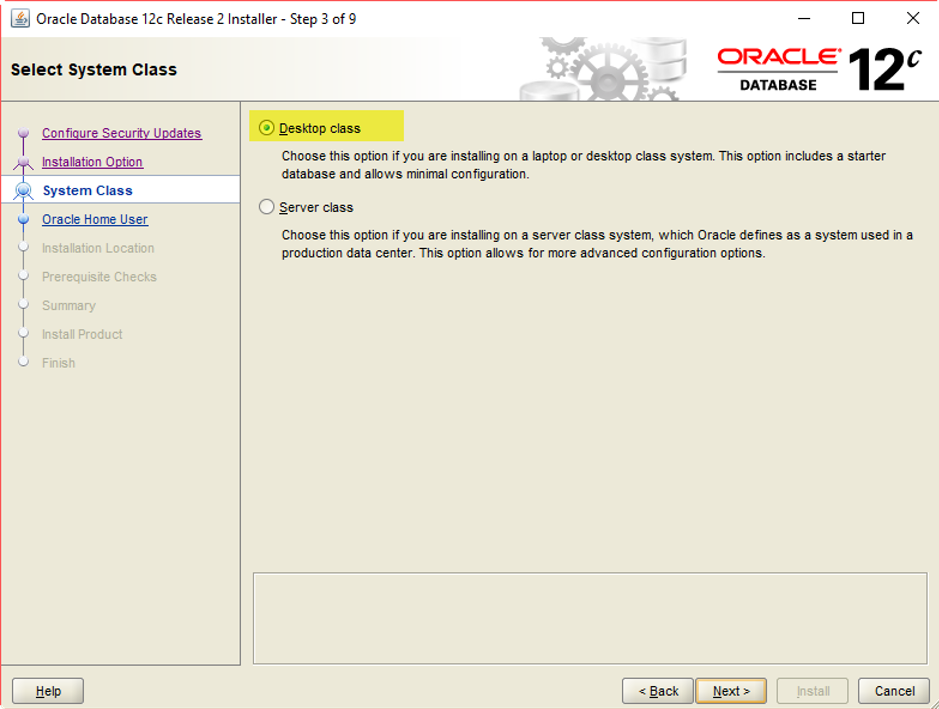
3. System Class -> Desktop Class
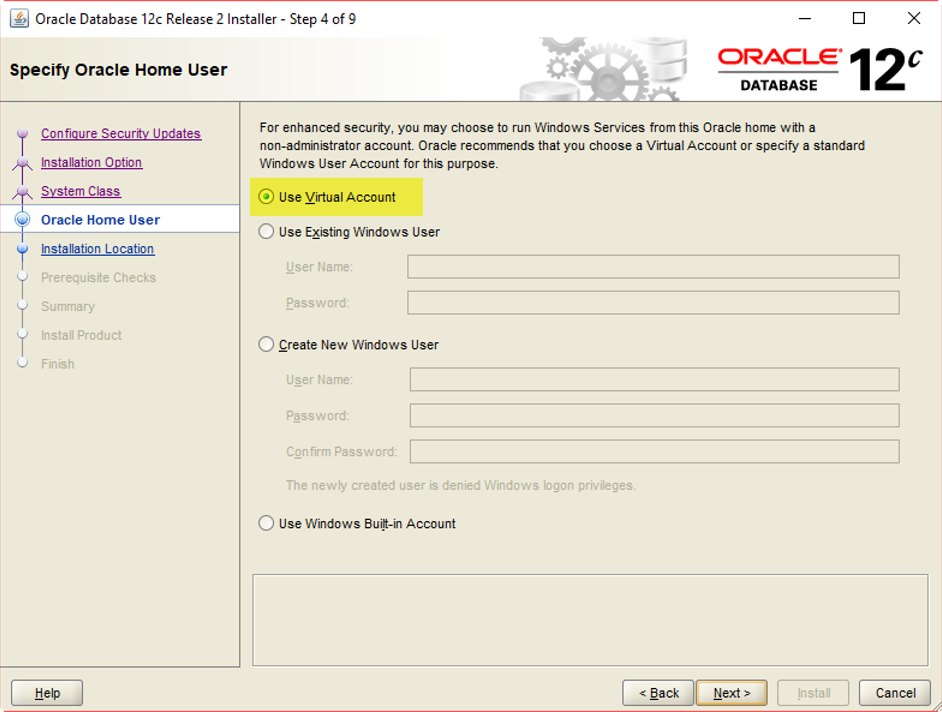
4. Oracle Home User -> Use Virtual Account
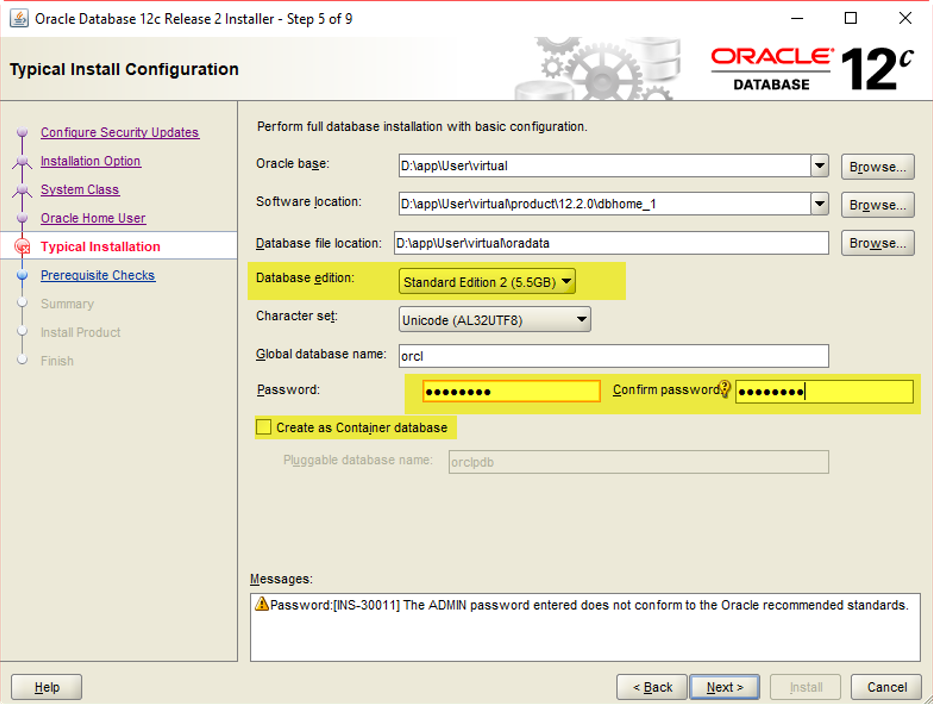
5. Typical Install Configuration
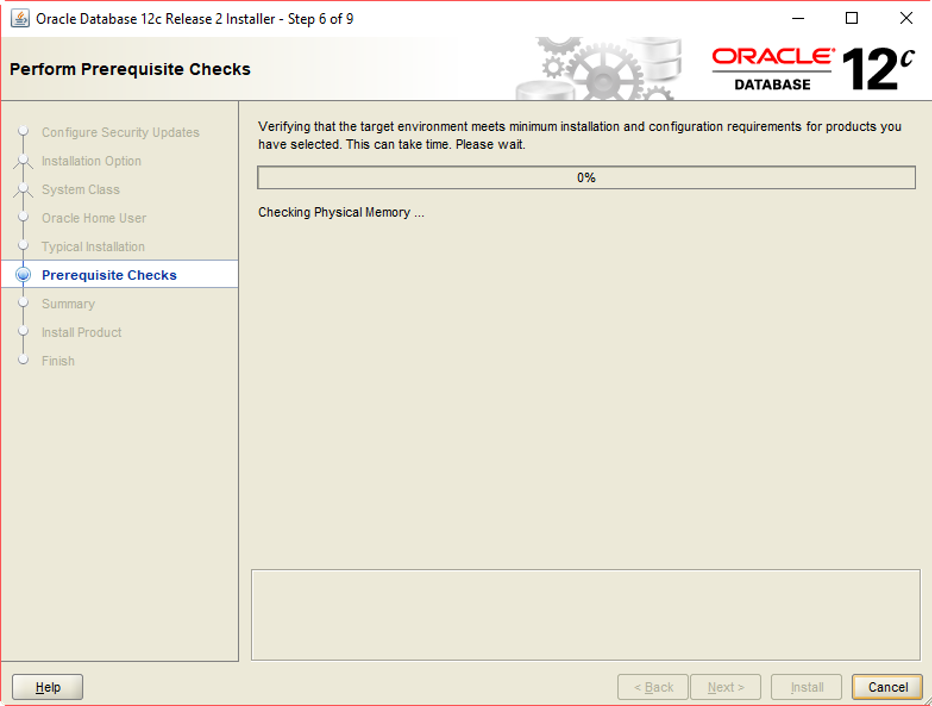
6. Prerequisite Checks
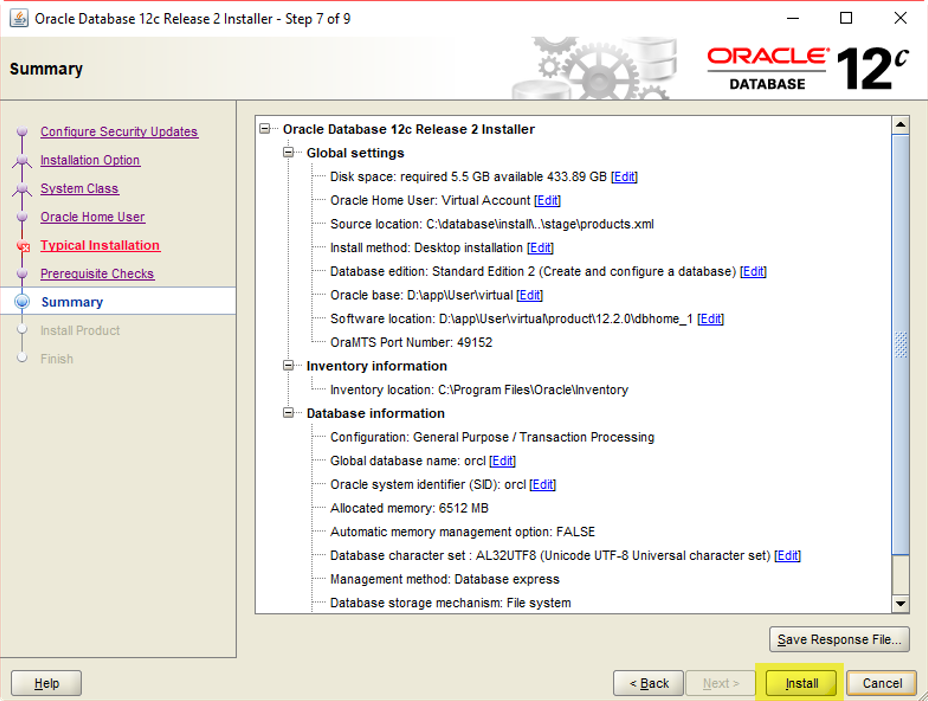
7. Summary
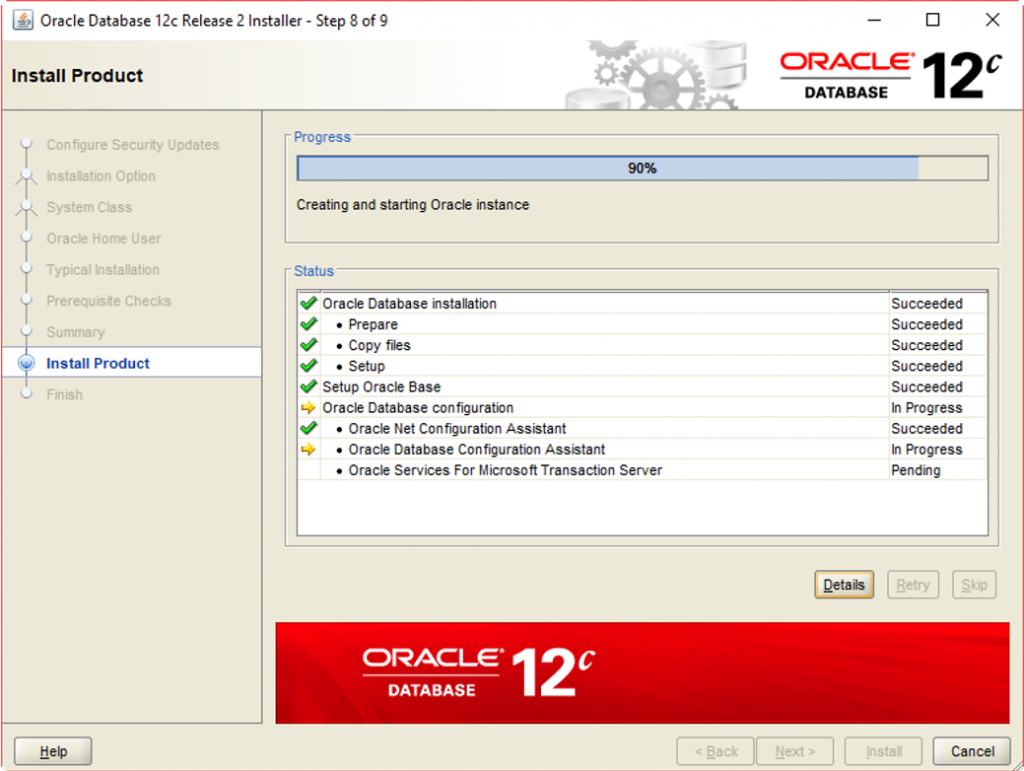
8. Install Product
9. Windows Security Alert
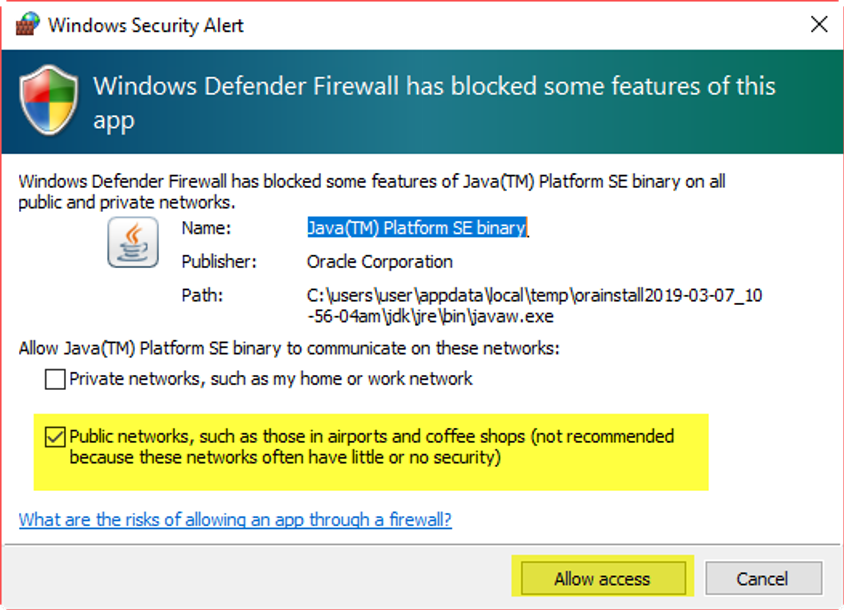
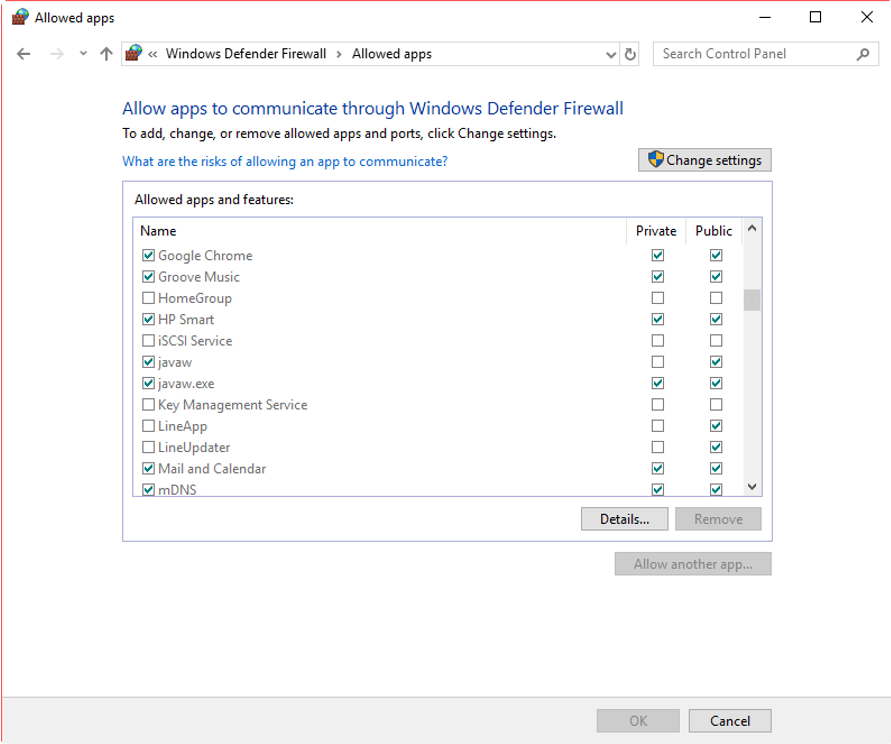
10. กรณีต้องการเปลี่ยน ค่า Allow apps and Features ของ Firewall สามารถ เข้าไปที่ Windows Defender Firewall -> Allowed apps แล้วคลิกเลือก การตั้งค่า Private หรือ Public ได้